Sunday, October 31, 2010

Second Idea for Assignment 1 Festival

After I searching for the details about the Water Festival, accidentally I found another festival which celebrate in Thailand too. That is Loi Krathong Festival which also known as 'floating candle festival' or 'the festival of lights'.
'Loi' means " to float " and 'Krathong" means a raft. Loi Krathong is probably the most picturesque and beautiful of all Thai celebrations.

Have a look on the images.


What is Loi Krathong Festival?
As the full moon of the twelfth lunar month (usually in mid-November) lights up the night sky, throughout the Thai kingdom, hundreds of thousands of ornately-decorated krathong or traditional banana leaf floats are set adrift in rivers and waterways in a spell-binding ritual called " Loi Krathong ". The tradition of this festival we know today has evolved from the royal rituals of the early Rattanakosin period in which several types of lanterns were set afloat in the Chao Phraya River and its waterways.


How to participate in the festival?
The Loy Krathong ritual is a simple one. One needs only to light the candles and the joss sticks, make one's wishes and let it float away with the current of a river or a canal. On that day, thousands of people will gather beside the canals and rivers. With krathong in hands, they light the candle, put some coins in the krathong and silently make a wish, and carefully place their krathongs in the water and release them to the current.
They watch intently as the float drifts silently downstream, hoping that the candle will not go out. Its flame is said to signify longevity, fulfillment of wishes and release from sins. Altogether it is considered a romantic night for couples or lovers. Couples who make a wish together on Lay Krathong are thought to stay together in the future.

It is an interesting and meaningful festival. 
I will considered to do this festival.
But, I will search again to find a better festival which I think that can present it well.^^

Hope you guys enjoy reading and gain some extra knowledge about those festivals in my blog.~

Friday, October 29, 2010

First Idea for my Assignment 1 Festival ^^

After being 'explore' difference types of the festivals, one of my selected festival is the Water Festival which celebrate in Thailand.

Here are some of the pictures how they celebrating their new year.


The images shown they are splashing water to each other.


They even dance to celebrate their new year.


Besides, they will go to pay a visit and respect to their family who had passed away in the wat (temple).


The Thai New Year, or Songkran. Songkran is known as the Water Festival because they believe that water will wash away bad luck, and spend the day liberally splashing water on each other.
Songkran actually celebrate on 13rd-15th April which consider as the hottest of the year and revelers cool down with the Songkran Water Festival. 13rd of April is known as the Maha Songkran Day or the last day of the old year whereas 14th of April is Wan Nao. The New Year begins on 15th April and is known as Wan Thaloeng Sok


Why am I prefer to do Water Festival ?
When the assignment given, I plan to do this festival. I had been go to Thailand and celebrate Water Festival with the citizens at there and it was happened this year before I came to MMU. What a fantastic and unforgettable experience I ever had. They keep splashing even though they did not know each other. Some of the children even waiting the cars passed in front of their house and they splash water to the cars. I still remember the day with my family and celebrating other country festival. So, that is why I want to create a wallpaper which about water festival since I had been one of the 'participant' and I think I can express it well . ^^


But, please stay tuned.
Other ideas will be post soon.
These was just one of my ideation of festivals.
Enjoy~^^

Saturday, October 23, 2010

Working with LAYERS

Photoshop layers are like sheets of stacked acetate. You can see through transparent areas of a layer to the layers below. You move a layer toposition the content on the layer, like sliding a sheet of acetate in a stack. You can also change the opacity of a layer to make content partially transparent.

Layers allow us to work on separate images in order to modify sections without changing the entire image.


Now, I am going to show how can we work with layers.


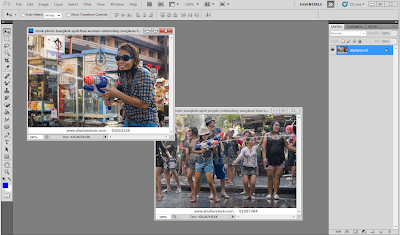
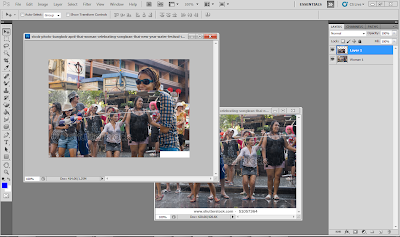
At first, open two images you prefer to work. Open them in separate tab as shown below.


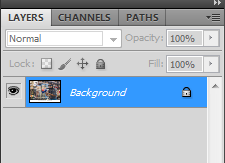
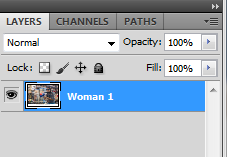
We can name the layers. Double-click on the word Background shown.


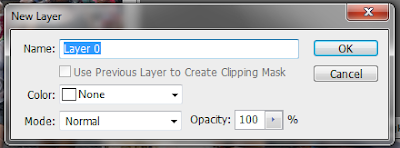
After this, a box will be show at the workspace. We can set the name, color and mode depend on ourselves that prefer.


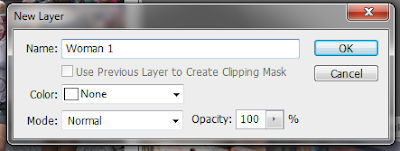
I decide to name the first layer as 'Woman 1'.


Click ok, and the word will appeared as shown at below.


Now, I want to drag my second image into the first image (Woman 1).
But, how to drag ???
First, select the Move Tool.


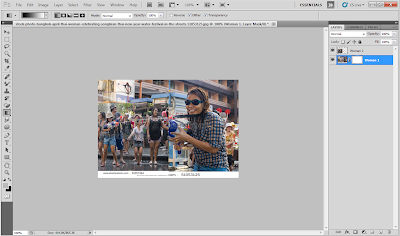
After select, click on the second image without release your mouse and drag it into the first image (Woman 1). As you can see, the second image is already move into the first image and another layer shown.


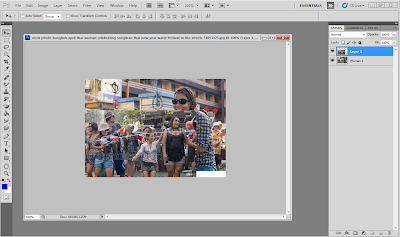
Close the second image, and focus on the combined image as shown.


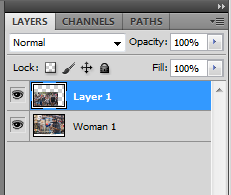
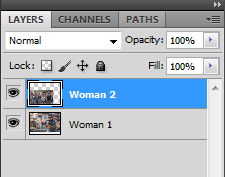
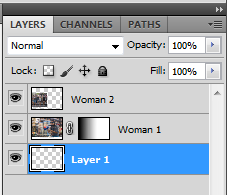
As you can see, the Layer 1 is sitting on top of the layer Woman 1. Then, repeat the same steps as shown above to rename the new layer. Double-click on the word Layer 1 and give it a much more useful name.


The new layer named as 'Woman 2' as shown below.


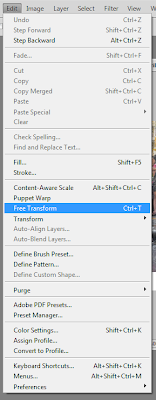
Since the layer Woman 2 is too big to live inside the layer Woman 1, click on Edit > Free Transform (Ctrl+T for shortcut).


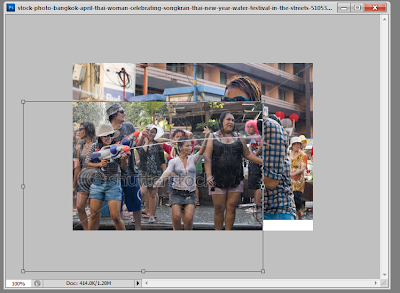
And next, this will be shown at the layer Woman 2.(A box around the layer) We can start to resize the image we want.


Now, we can start to work on our photo and change the image back to full screen mode, easier for us to work on it.


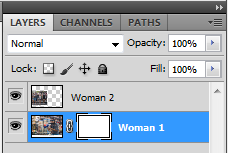
Click on Add Layer Mask and this will be shown at the layer Woman 1.


Select Gradient Tool to change the opacity of your image which is the layer Woman 1.


Next, click on the way you prefer the change of opacity on your image as shown. I prefer to change the opacity from left to right.


This will be shown after the changed.


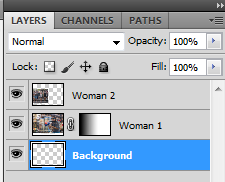
Then, open a new layer to create the background of your image.


Change the name of Layer 1 to Background. So, we will clearly know that which is the layer use for, and we will not get confuse on it.


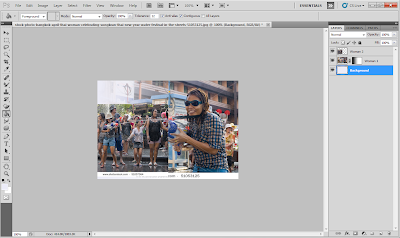
Select Paint Bucket Tool to paint the color that you prefer on the new layer. I prefer to paint it in white color as it will show out the layer Woman 2 clearly and this color is much suitable and better than other colors. Therefore, I decide to use white color as well.


Finally, there is the result of my image.


This is what I learn about the layers. Hope you guys can catch up what I had post it here.
And here are some guides~
Hope you guys enjoy while watching^^

First video:


Another video:


Hope you guys can learn some from these video.
Enjoy~^^

Photoshop Workspace

How to open a workspace in Photoshop???


First, open your Photoshop, as you can see as below:


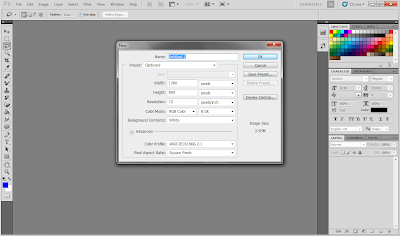
Next, to create a new workspace, click on File > New.


There will be a box shown. At here, we can give a name to our file. Besides, we can set the preset, width, height, resolution, color mode, background contents, and etc. in our own, related with the work we prefer.


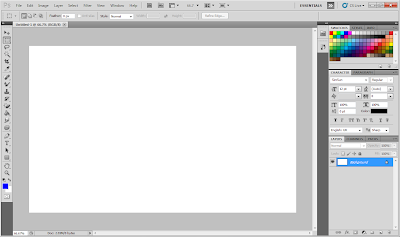
After setting done, click ok. Finally, there is a workspace for us to create works.


Wondering how to open an image in your workspace?


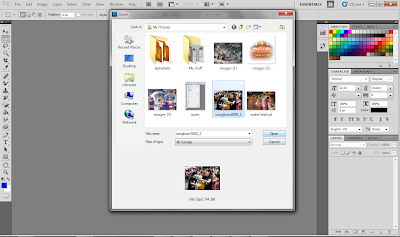
First, click at File > Open


Then, there will be a 'open box' shown, choose the image that you prefer to open, click Open.


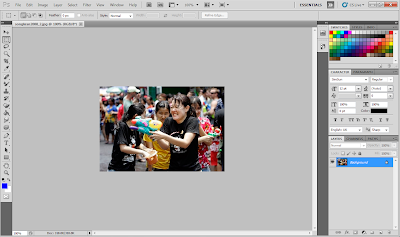
Finally, there is an image shown, and you can start to edit your photo.


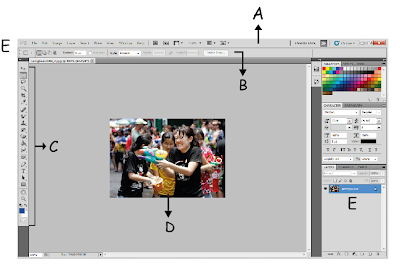
Workspace Basics


We manipulate documents and files using various elements, such as panels, bars, and windows. Any arrangement of these elements is called a workspace.


A. Menu Bar : contains all of Photoshop’s available options.

B. Options Bar : set the options for the currently selected tool.

C. Toolbox : has various tools for editing the image.

D. Image Area : the currently open image(s).

E. Palettes : various panes to control different aspects of the project. Includes layers, channels, paths, history, etc.


The Selection Tools

What do selection tools play in photoshop ???

Selection tools allow you to select a portion or a subset of an image to work on. Most of Photoshop’s other tools and filters can then be applied to this selected area, altering its color, shape, texture, position or other attributes, while leaving the rest of the image untouched.


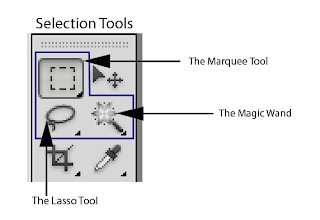
There are three types of selection tools
a) The Marquee Tool
b) The Lasso Tool
c) The Magic Wand Tool


The Selection Tools


So,what is the function of the selection tools ???

a) The Marquee Tool


>>make rectangular, elliptical,single row, and single column selections


b) The Lasso Tool


>>make freehand, polygonal (straight-edged), and magnetic (snap-to) selections.


c) The Magic wand


>>selects similarly colored areas.